1
Create a project
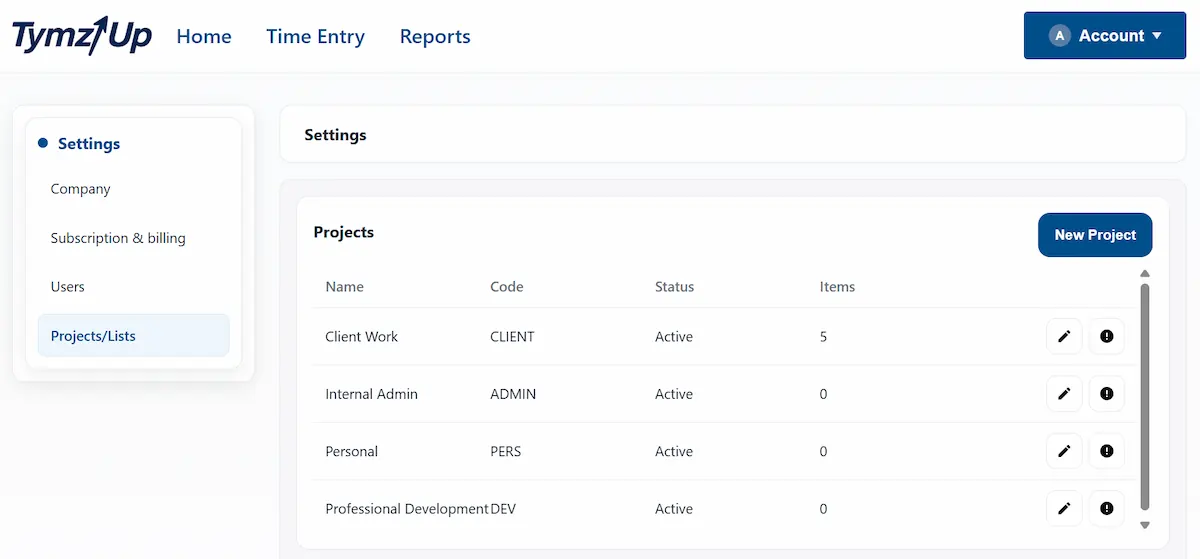
Go to Settings > Projects/Lists and create a project for the work you want to track.
Use a clear name, such as a client, internal work area, or project category.

Create one project, save one time entry, and review the result so you understand the basic TymzUp workflow.
This guide follows the shortest useful path from setup to a report-ready time entry.
Use these steps when you want the minimum setup needed to start tracking time.
Go to Settings > Projects/Lists and create a project for the work you want to track.
Use a clear name, such as a client, internal work area, or project category.
Tasks and list items add detail inside a project. Skip them if project-level tracking is enough for now.
Start with fewer choices. Add tasks later when reports need more detail.
Open Time Entry, choose the date and project, enter hours, and add a note that will make the work easy to review.

After saving, check that the entry is attached to the right project and that the hours look correct.
A quick weekly review helps catch missing entries before reports or exports depend on them.
Open Reports, choose a date range, and use Run Report to confirm the time appears in reporting.
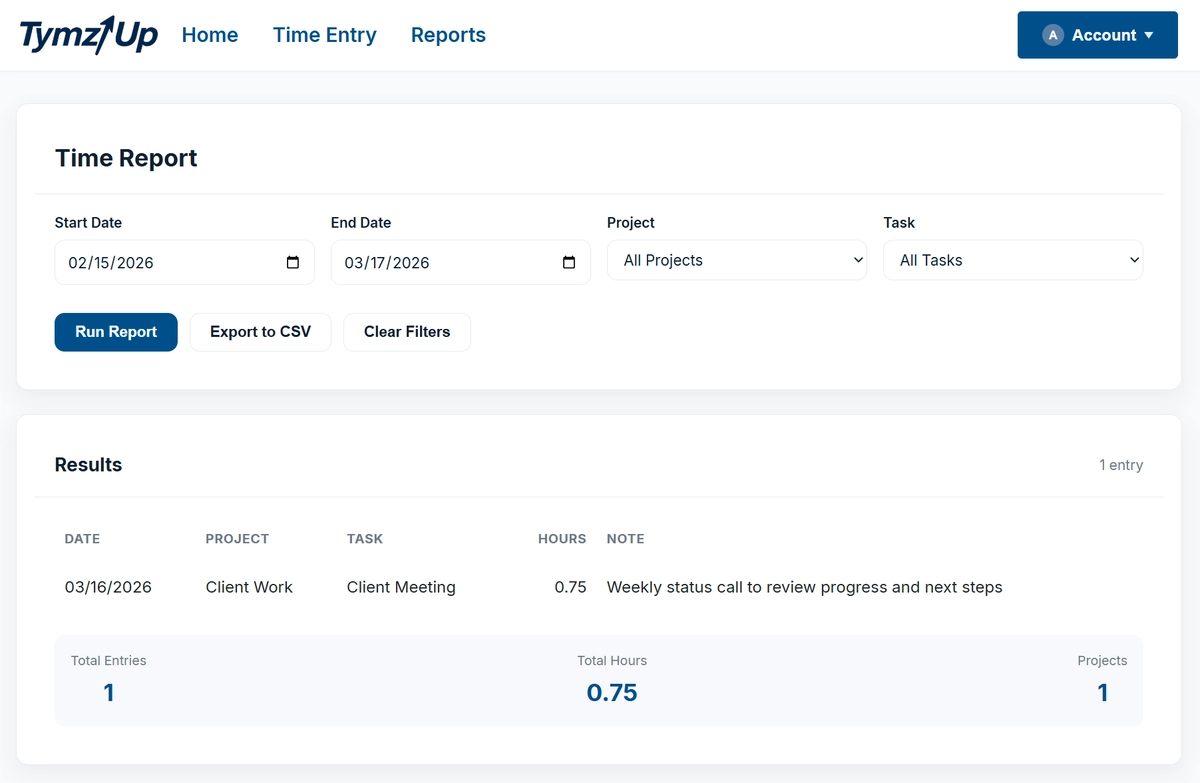
Project: Client Work. Task: Discovery. Hours: 2.5. Note: Kickoff meeting and requirements review.
After your first entry, reports and project setup become easier to understand.